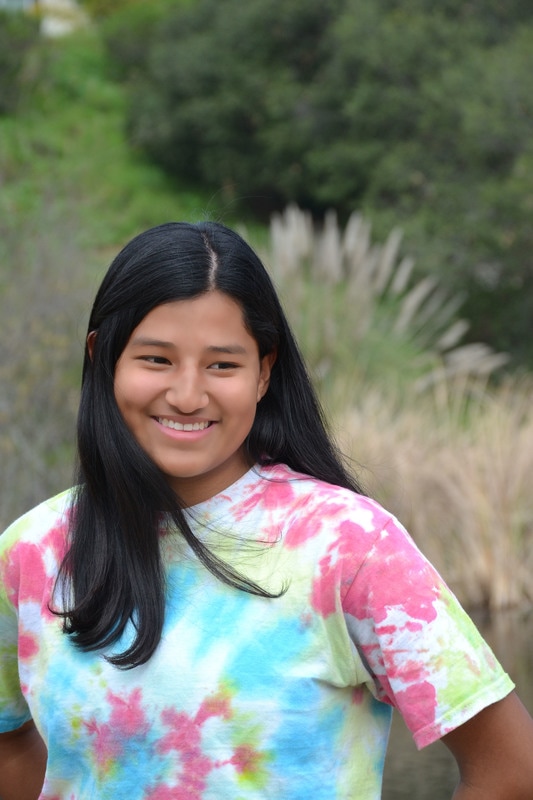
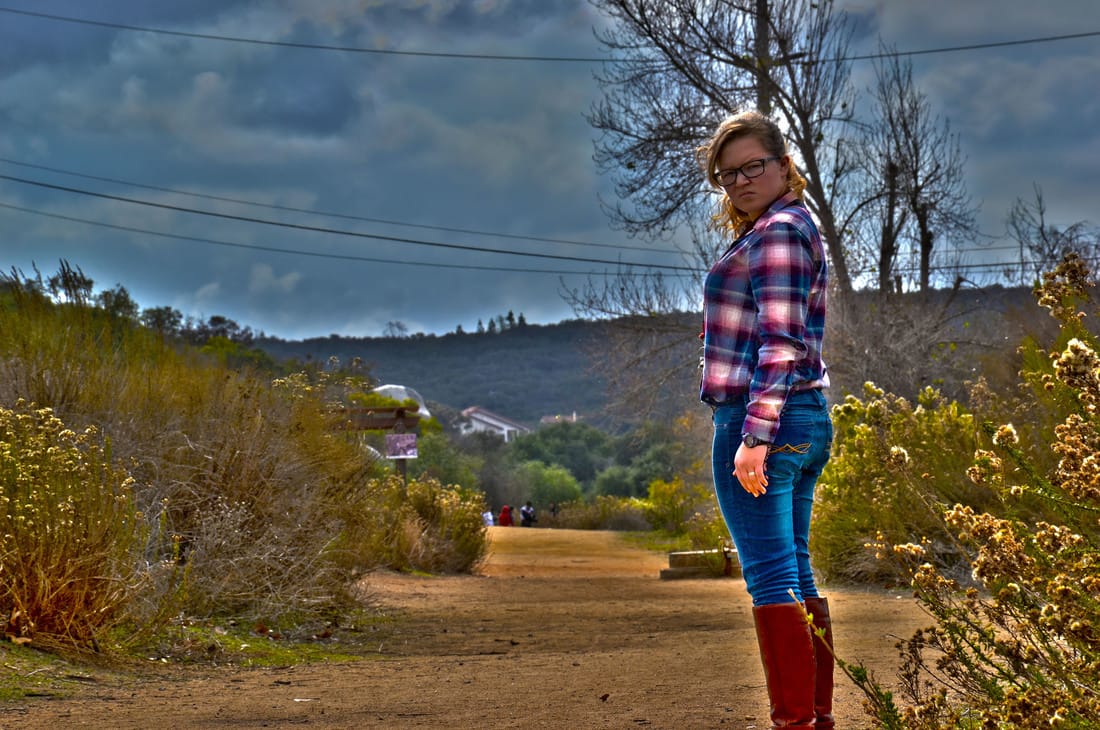
 ISO 400, Aperture f/8, Shutter Speed 1/500  ISO 400, Aperture f/8, Shutter Speed 1/640  ISO 400, Aperture f/8, Shutter Speed 1/320  ISO 400, Aperture f/8, Shutter Speed 1/500 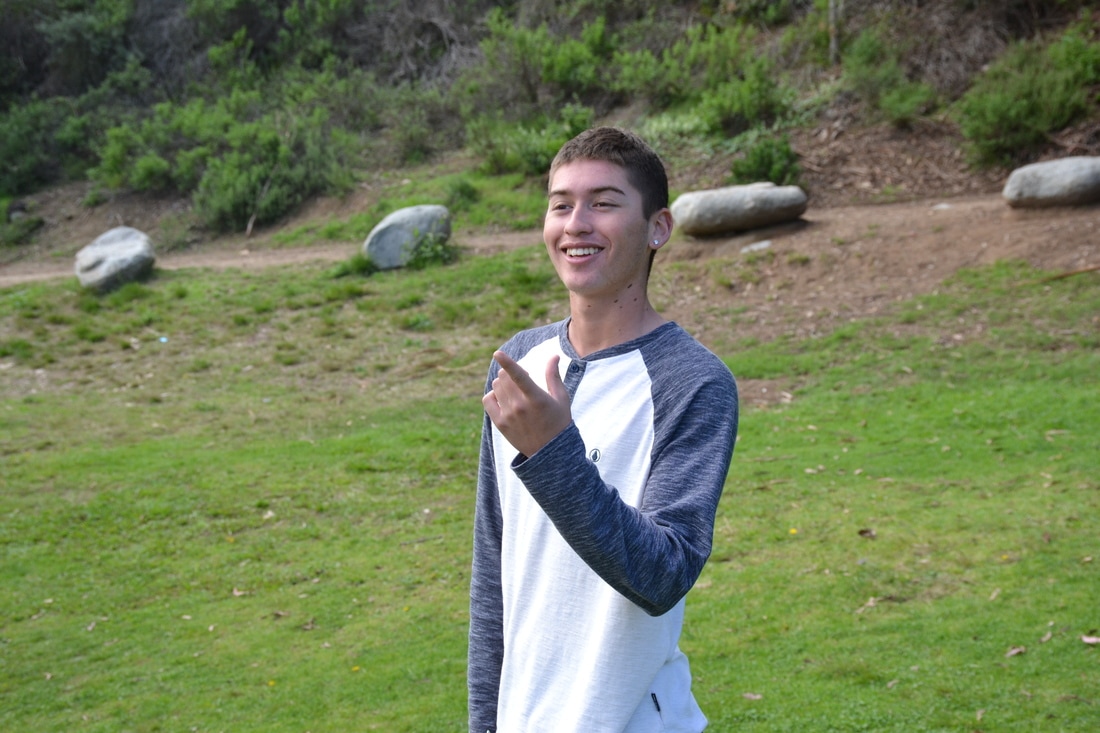 ISO 400, Aperture f/8, Shutter Speed 1/250 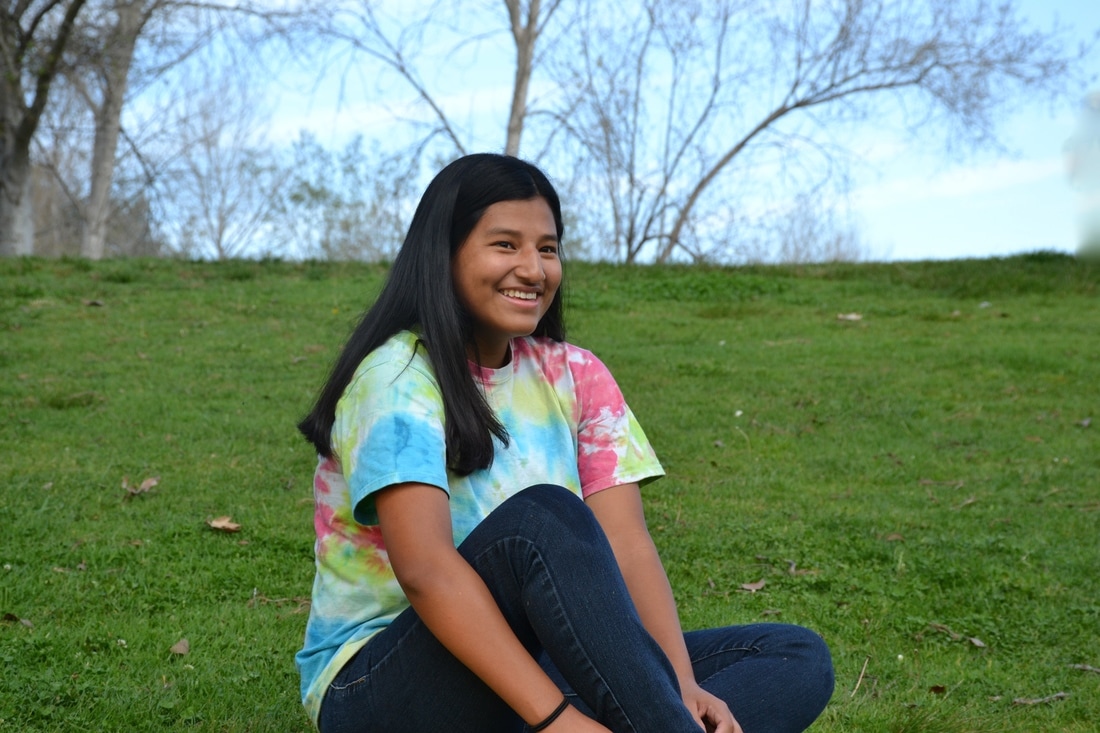 ISO 400, Aperture f/8, Shutter Speed 1/500 From doing this project I learned hoe to position people so that they are in front of any noise in the background or anything like that. The shot list gave me the poses to use and it was really helpful, but the only decision I had to make was to choose who's gonna pose. A little rock, paper, scissors always works that out. I used the reflector to bring light to the model's face facing away from the sun. In the retouched pictures, I mainly got rid of acne and blemishes that stood out. Some photographers that use this type of style include wedding photographers and sport photographers.
0 Comments
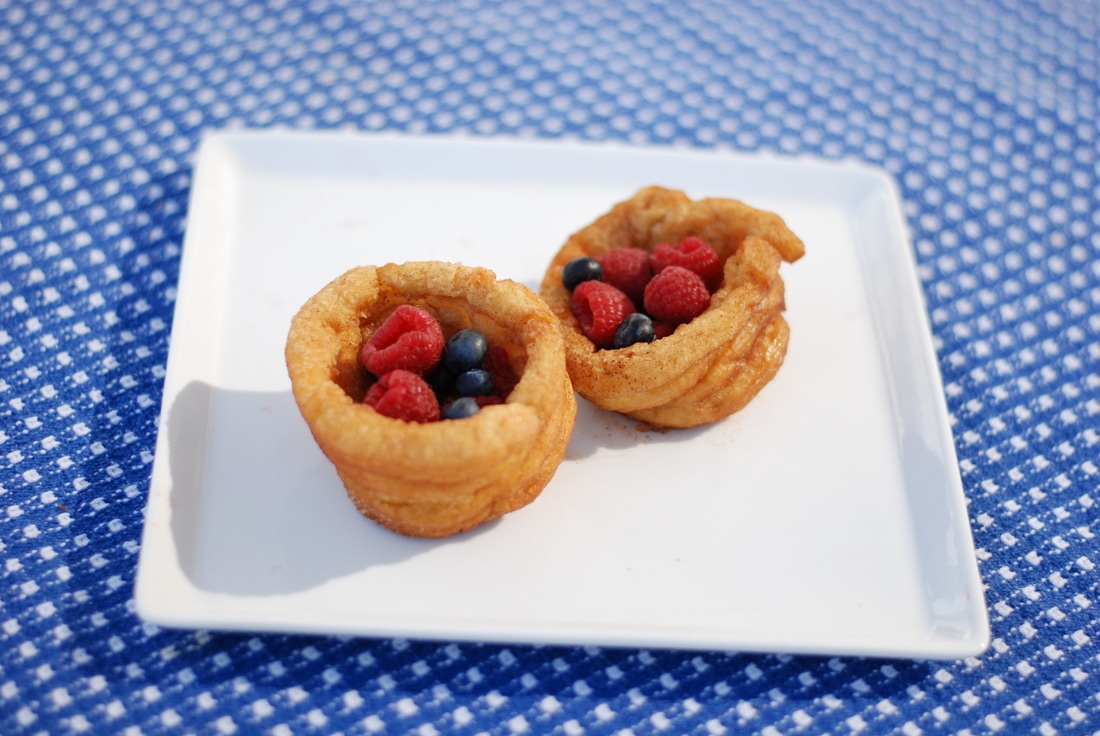 Aperture-f/1.8, ISO 320, Shutter Speed 1/3,000 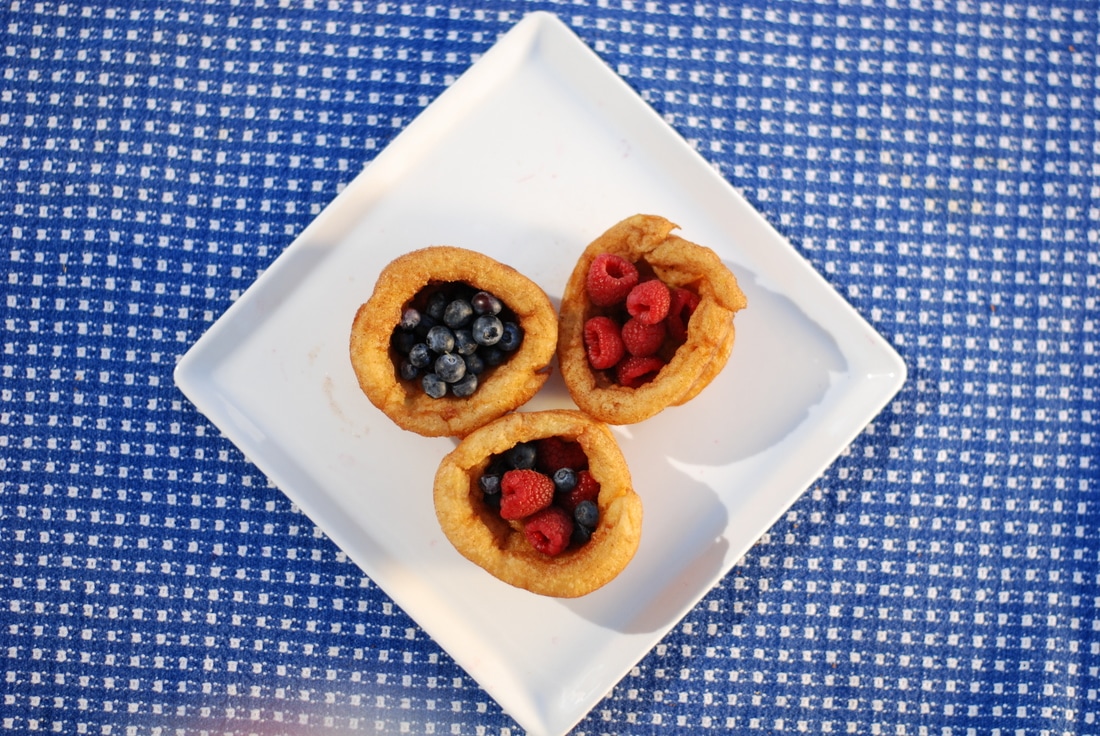 Aperture-f/1.8, ISO 320, Shutter Speed 1/4,000 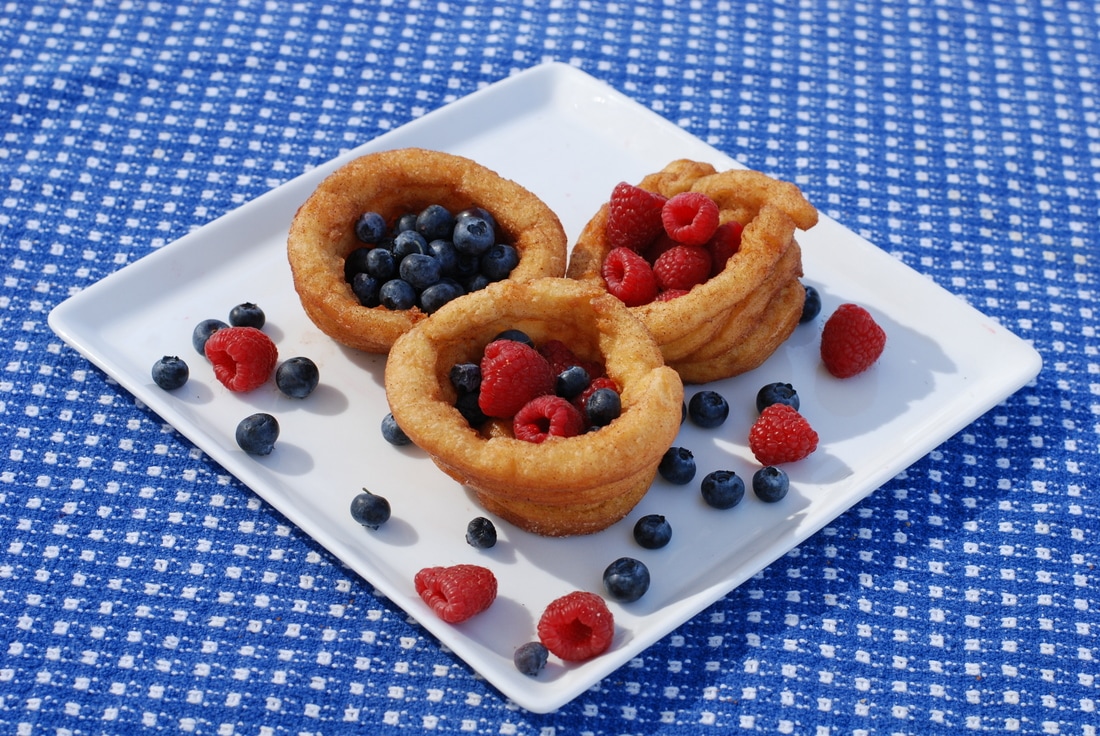 Aperture-f/1.8, ISO 320, Shutter Speed 1/3,000 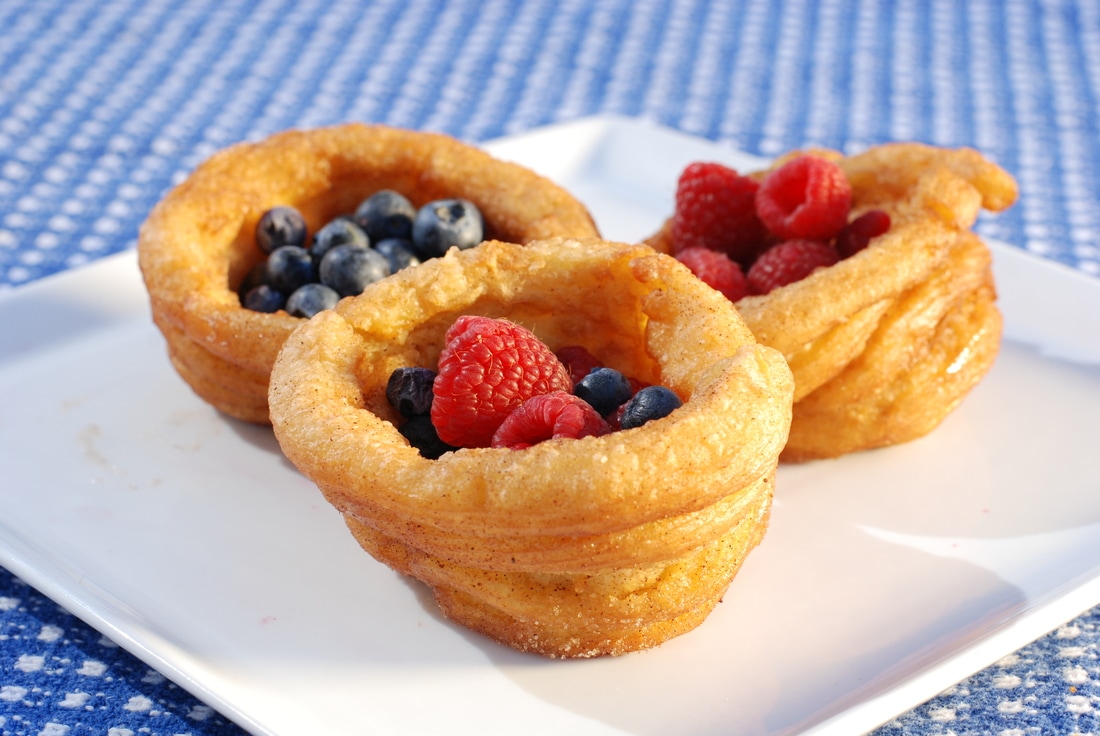 Aperture-f/8, ISO 320, Shutter Speed 1/180 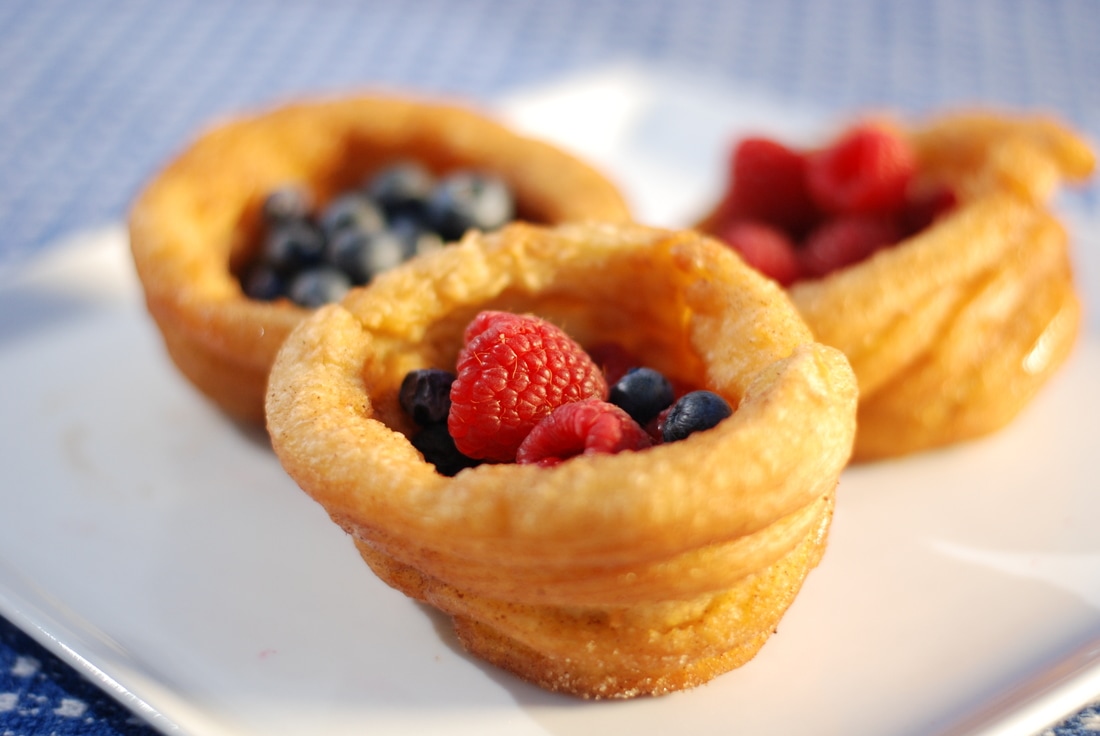 Aperture-f/1.8, ISO 320, Shutter Speed 1/4,000 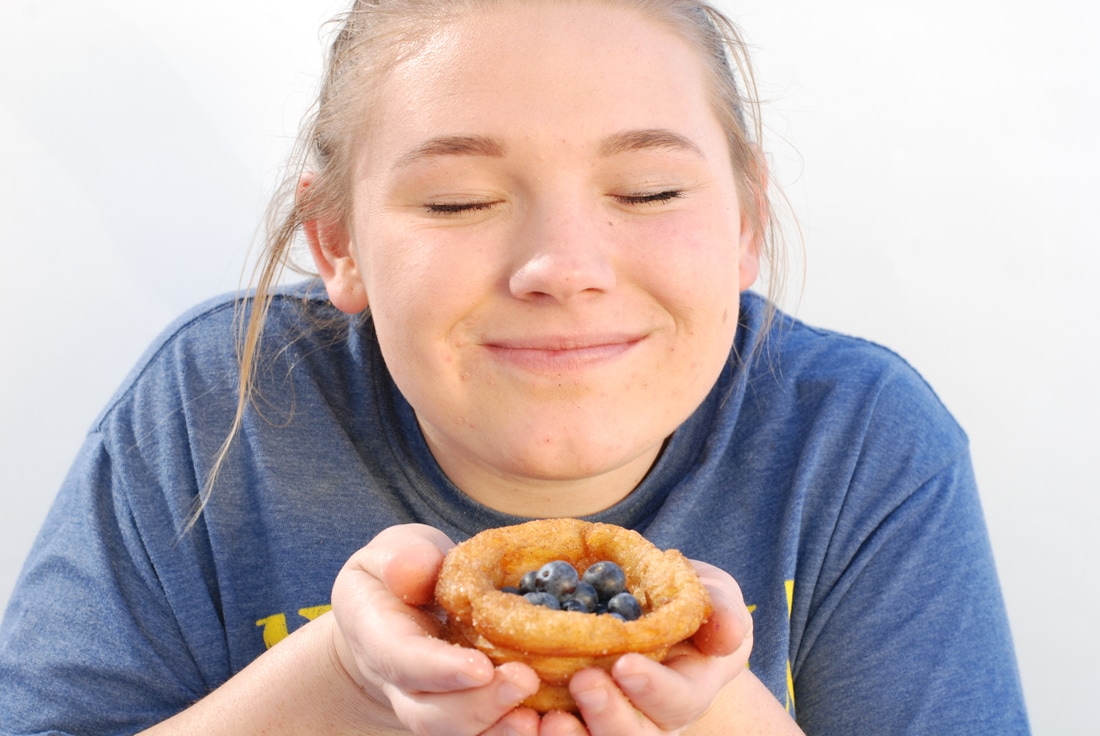 Aperture-f/8, ISO 320, Shutter Speed 1/125 For this project I made and brought some churro bowls. Along with the bowls I brought some fruit to brighten up the brown from the bowls. I learned that the food in the commercials aren't always actual food, but some chemicals or art products. I had not known that there was so much preparation that goes into food photography. There's probably just as much preparation as a normal photo shoot. One thing I did to make my food look like a photographer's work is use the gold light reflector to brighten the picture like the one above. Something that I had mot known is that most of the time, the food will have a standard one color background. Some businesses that use food photographers are McDonald's, Burger King, and Olive Garden etc. I like the fact I brought a very unique food that I made for the first time and succeeded in making it. I would totally do this again. I had fun seeing all the creativity everyone had and doing different things that enhanced the picture.
 While in photoshop I had a difficult time arranging the letters. Mainly because I was being hard headed and didn't pay attention to the teacher's layout that she sent to all of us. Once I had the layout, I just put the pictures in the respective spots. The things I'm most proud of is using the creativity I never thought I had.
 In ten years I see myself playing baseball. That has been a dream of mine since I was about 10 when I realized the potential I had. I plan to attend college and play baseball there. I've been thinking of lately how if baseball doesn't work out I might try and walk on the track team since one of my tools in baseball is my speed. If actually playing a sport doesn't work out, I want to become involved with sports. Specifically broadcasting would be really fun. 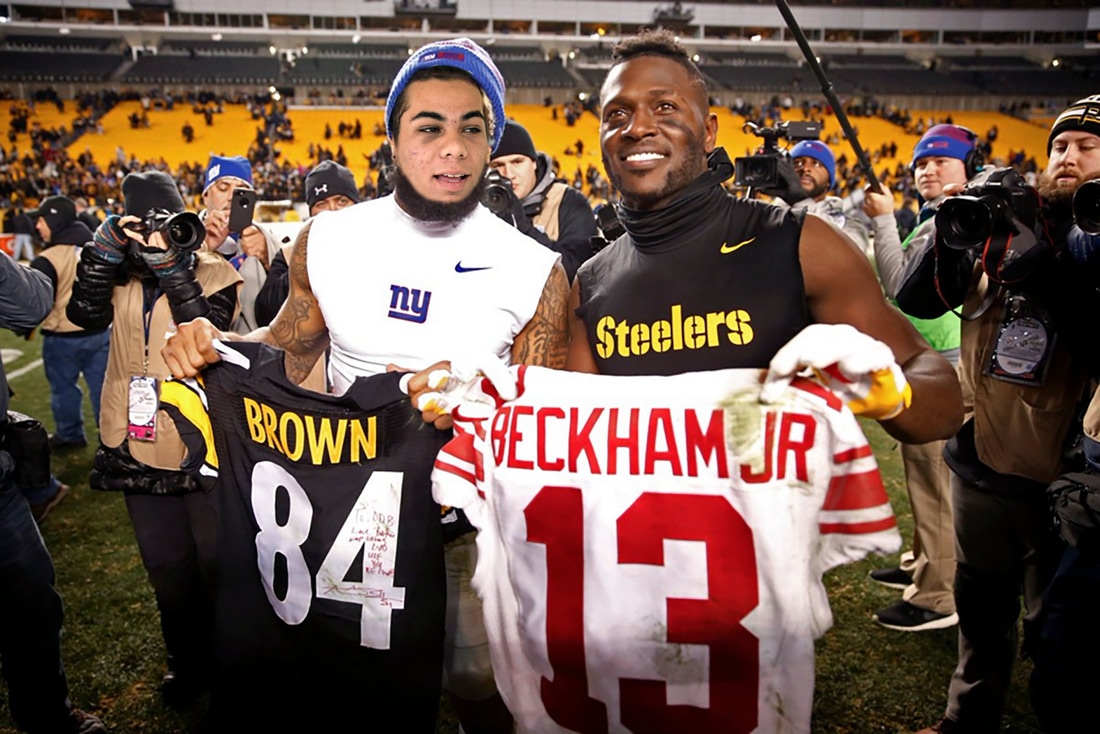 Here I put myself as Odell Beckham Jr. and on the side of him is Antonio Brown of the Pittsburgh Steelers. These two are the most popular in the game of football for their amazing skill and killer dance moves once they have scored a touchdown.
Presentation on Zach Cordner by Taylor Honore
docs.google.com/presentation/d/1I8EdIBHtDOQXy9E0JpoR6_3J7xuLRVNLfw4nPf-pS9c/edit?usp=sharing 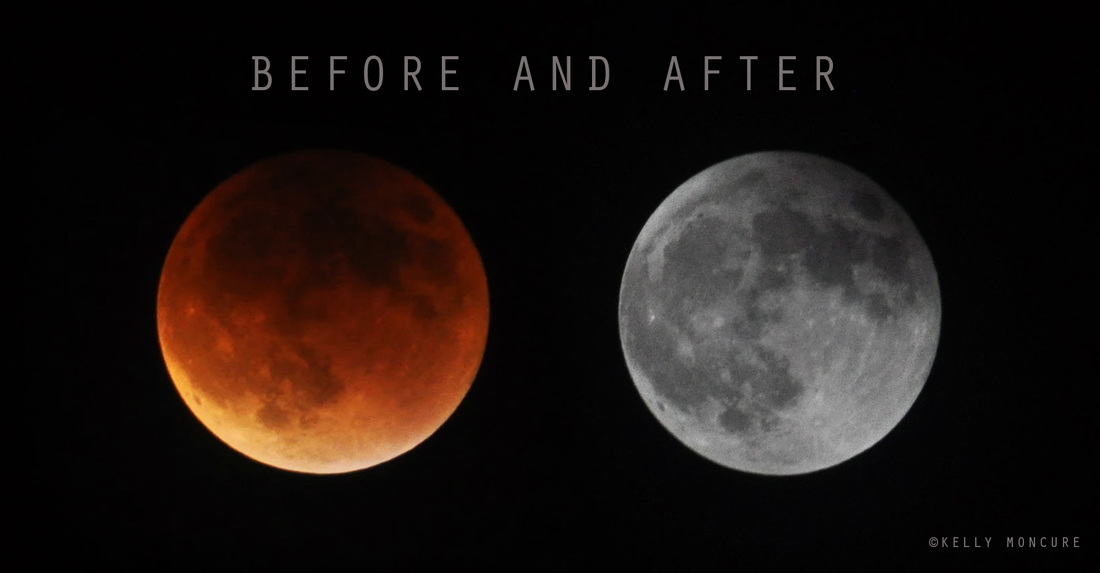 To photograph the moon:
1. Use a tripod! A flat surface will only allow you to shoot straight, and shooting the moon means that you'll be shooting up and constantly re-adjusting the tripod as the moon moves throughout the night. 2. Use a shutter release cord, remote or the camera's self timer if you don't have one, so that you don't move the camera when pressing the shutter release during a long exposure. 3. Use a zoom lens and zoom in as much as you can to the moon. It's okay if it's not a super fancy lens, this was shot using a 15 year old $100 lens. Focus in on the craters and details on the moon. 4. ISO 1250- 1600, so that you can use as fast a shutter speed as you can without losing detail-the longer the shutter speed, the more chances you have the camera will shake even slightly in the wind, resulting in an out of focus photograph. 5. Aperture priority of f/5.6 since you are not worried about capturing any details other then the moon. 6. Bracket your exposure, meaning over expose and underexpose the photograph from what the camera is telling you. Generally the camera will overexpose the moon, so you'll get nothing but a white blob in the sky. Use the exposure compensation button (the +/- button below the shutter release) and change the exposure to -0.5, then -1.0, then -1.5 and so on, until you start seeing detail in the moon. You may go as far as -5.0 exposure compensation to get what you need. 7. Take a fair amount of photos and keep refocusing as the night progresses. The photographs may look focused on the camera's display, but you won't really see if they're completely in focus until you upload them onto your computer screen. 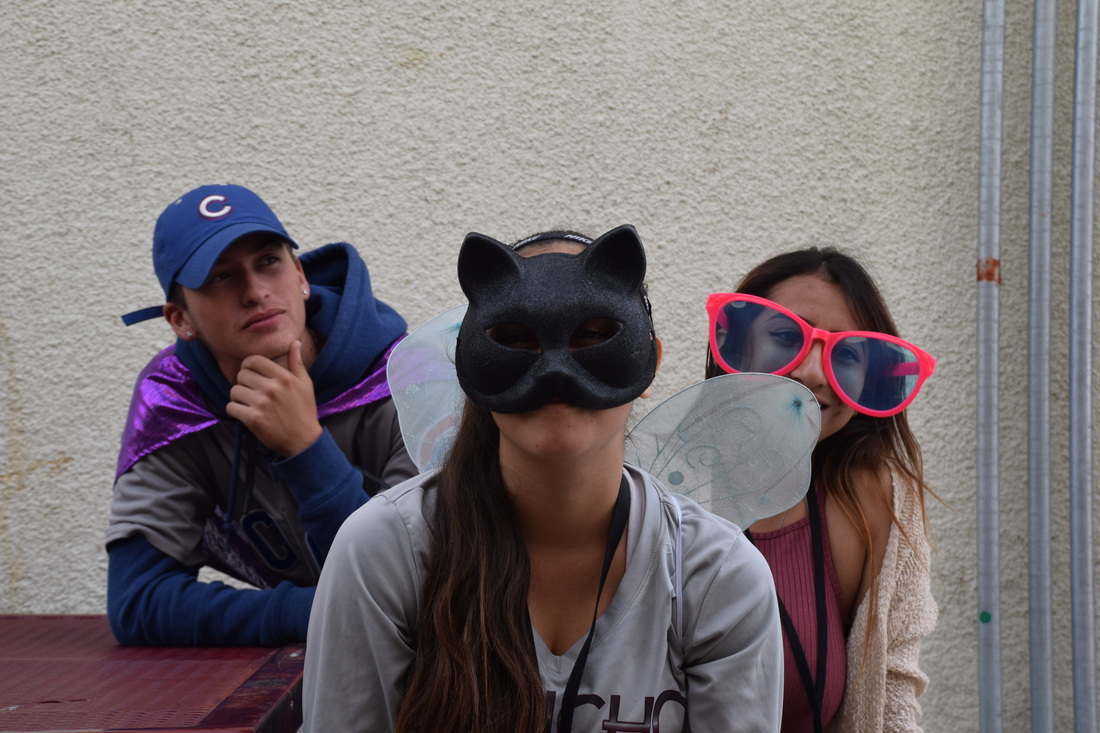 ISO 400, Aperture f/8, Shutter Speed 1/320 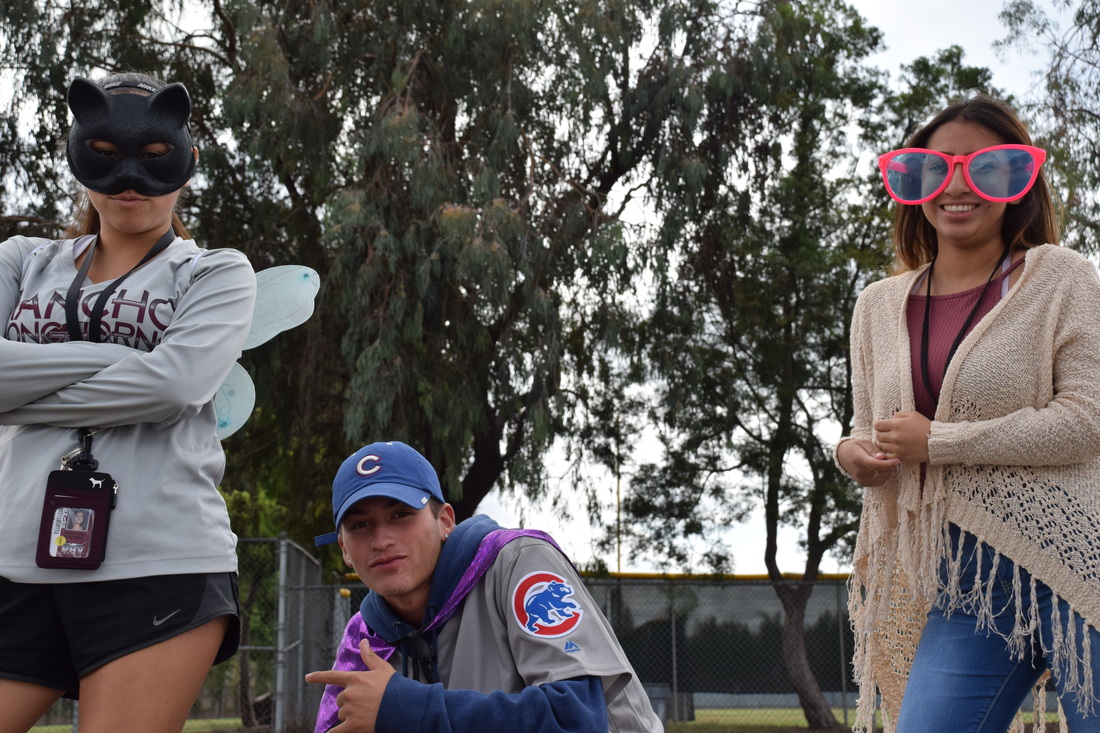 ISO 400, Aperture f/8, Shutter Speed 1/800 Balance: This picture is of the push sleds for the football team. I liked this for balance because one, all the "defenders" all look the same and two, there are the same amount on each side.
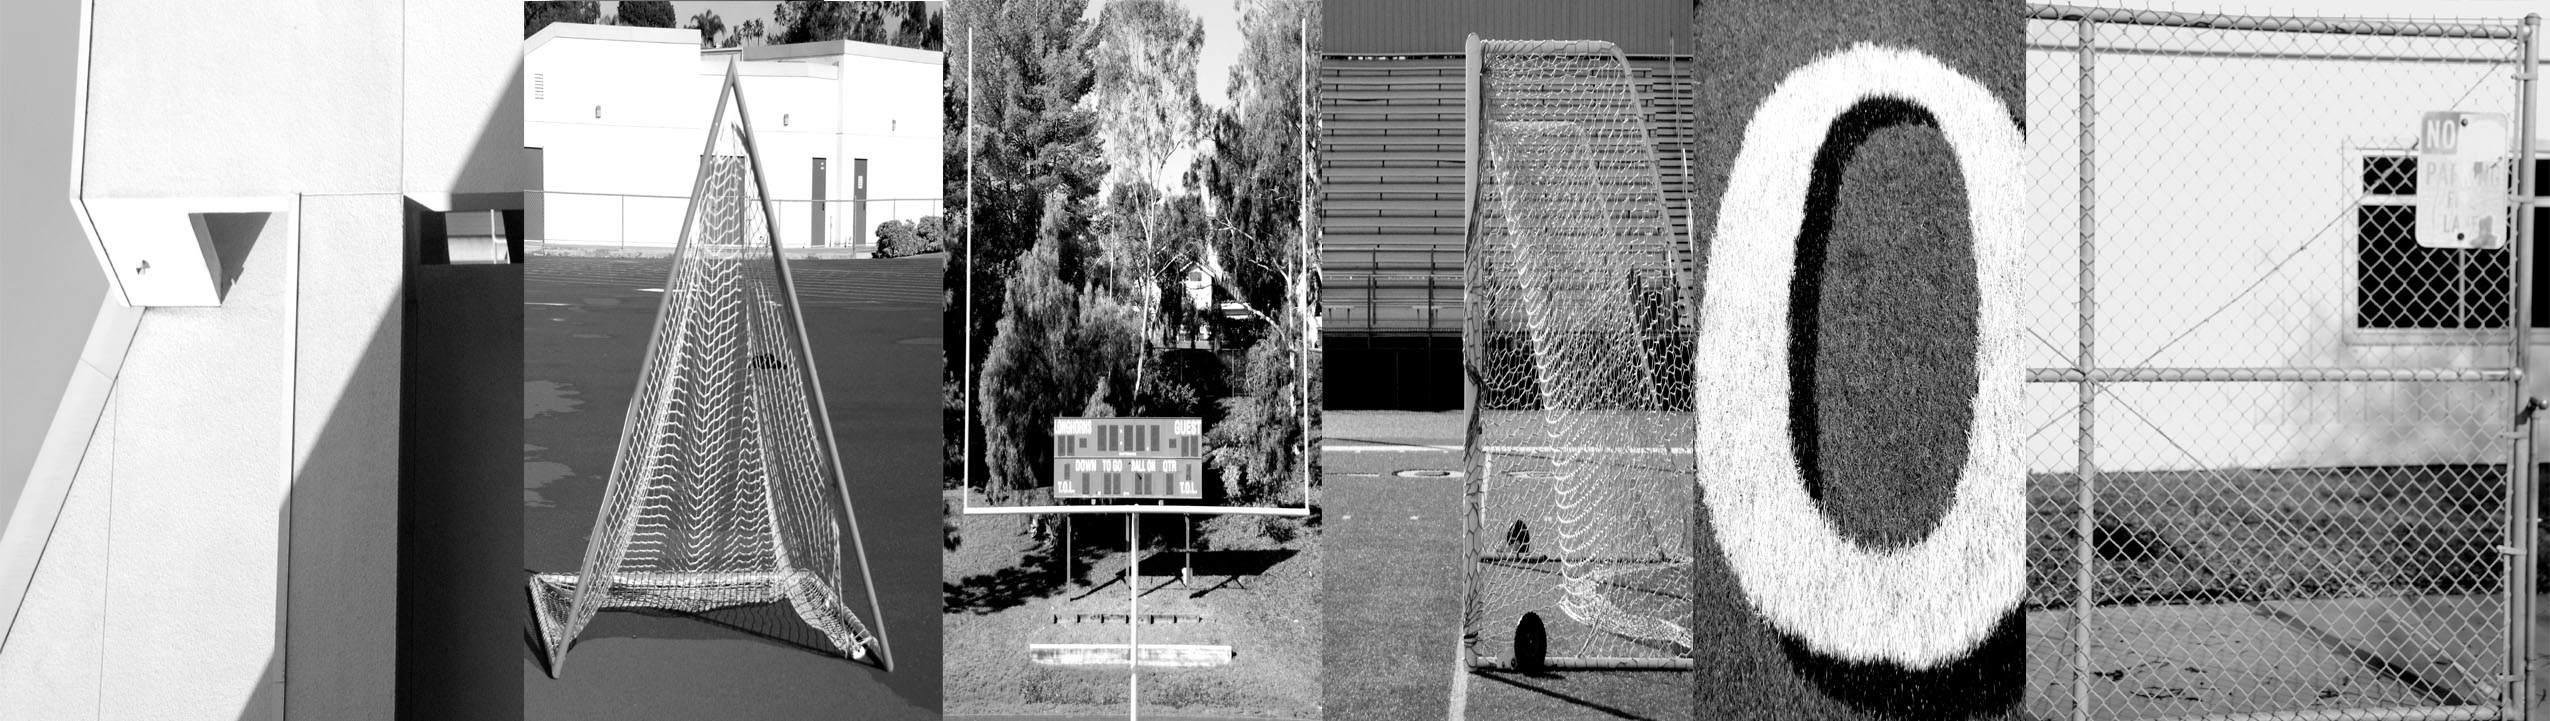
Proportion: In this picture my model is mimicking the shape of the goal post. The proportion in this photograph can be see in the largeness of the goal post and the size difference with the model. Rhythm: This picture is of a passing class heading back to their class. The rhythm in this picture can be seen in the blurriness and in all the students doing the same action, walking. Emphasis: I used this no parking sign as a symbol for emphasis. The emphasis is the actual no parking symbol itself. Harmony: This picture is of the sun shining down on the side of a tree. Harmony is achieved by the sunshine on the branch and highlighting the leaves. Variety: For variety I had my model attempt to do a handstand. Although the result wasn't great, I wanted to imagine as if my model was holding the world up. Unity: In this picture I attempted to capture unity. Mainly I wanted to capture unity as a people no matter what race or background you come from, we can come together and still be peaceful. |


 RSS Feed
